
How To Photograph A Sports Card Collection
The exact photos a buyer needs to judge collection size, eras, condition, graded cards, sealed product, and likely highlights before an in-person visit.

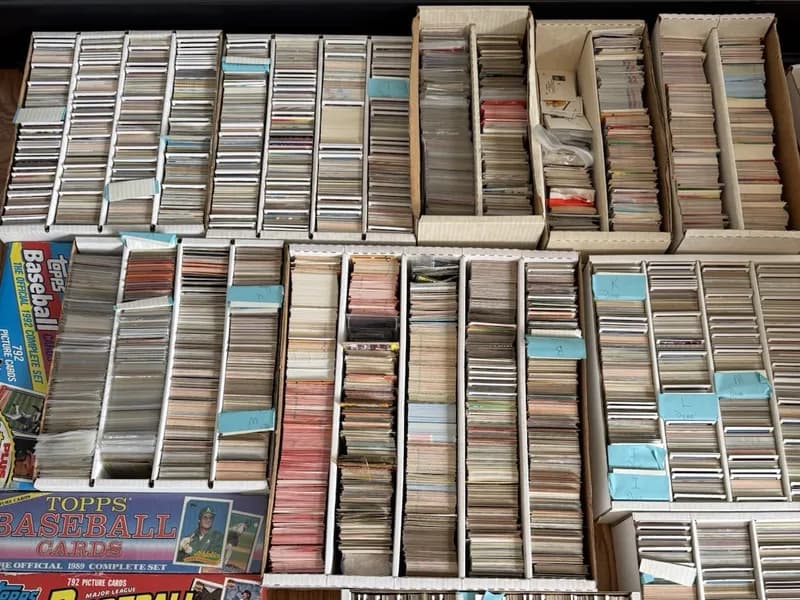
Good collection photos do not need studio lighting or a card scanner. They need to answer a buyer's first questions: how much is there, what years and sports are present, how was it stored, and where are the likely highlights?
Start wide, then move closer. A dozen useful photos can save hours of counting and can tell us whether we need more detail before planning a trip.
Do not arrange thousands of cards on the floor or remove every card from its holder. Photograph the collection as it sits, then focus on the groups that carry the most information.
Photo 1: The Entire Collection
Take one photo from far enough away to show the full space. Include every shelf, stack, tote, box, binder, graded-card case, and sealed case that is part of the sale.
If the collection fills more than one room, take one wide photo in each room. The goal is to show scale and storage, not individual cards yet.
Photo 2: Open Boxes And Representative Rows
Open a few boxes and photograph the rows from above. Choose boxes from different shelves or labels so the sample does not show the same set repeatedly.
- Long boxes: show the full row and enough card tops to reveal the storage and general era.
- Set boxes: photograph the printed year and set name, then show whether cards are inside.
- Binders: show several representative pages, including the first and last filled pages.
- Loose cards: show how they are stored and any visible condition concerns.
Photo 3: Years, Sets, And Labels
Photograph handwritten dividers, factory-set labels, case labels, and a few card backs. Card backs often show the year, manufacturer, card number, and player statistics that help identify the material.
If a box contains mixed years, show several sections. A label that says baseball is less useful than a photo that shows whether the box is 1970s Topps, 1990s base cards, or modern parallels.
Photo 4: Likely Highlights
Group the cards that look most important and photograph them together. Include older cards, stars, Hall of Famers, rookies, autographs, memorabilia cards, numbered cards, rare parallels, and any card that was stored separately.
Photograph both sides of a valuable raw card when identification or condition is uncertain. Keep the card in its sleeve or holder unless glare makes the details impossible to see.
Photo 5: Graded Cards And Sealed Product
For graded cards, make the full label readable. The grading company, numerical grade, card description, and certification number help us find the closest completed sales.
For sealed boxes and cases, show every side, the factory wrapping, seals, corners, and any tears or crushing. Do not open sealed product to show what might be inside.
Photo 6: Condition Problems
Show water damage, mold, smoke residue, warped boxes, insect damage, stains, and major card damage. Honest condition photos help a buyer plan safe handling and prevent a surprise during inspection.
Use daylight or a bright room, hold the phone steady, and check that labels are readable before sending. Wide photos plus a few clear close photos are more useful than hundreds of dark or repeated images.
What To Send With The Photos
Add your city, a rough card count or box count, the main years and sports, and whether you want to sell everything. Mention any deadline and any part of the collection that you plan to keep.
You do not need to know what the collection is worth before you send it. The photos are the first screening step, and we can ask for another angle or close-up when a specific card or box needs it.